How to tie a tie: the easiest knot for beginners
In this guide
Most people who look up how to tie a tie are already dressed, with the collar buttoned, the tie in one hand and somewhere to be: a first interview, a friend's wedding, or simply the first morning without someone to help. The knot to learn first is the four in hand. It takes six moves, works with nearly every collar and tie, and forgives mistakes: if something goes wrong, you pull it loose and start again without untangling anything.
This guide walks through that knot from your own point of view, with a check after every step so you know you are still on track. After that it covers the two things that decide whether a tie looks right once it is tied, the length and the dimple, and then how to choose a different knot when the four in hand is not the best fit for the shirt or the occasion.
Set up the tie before the first move
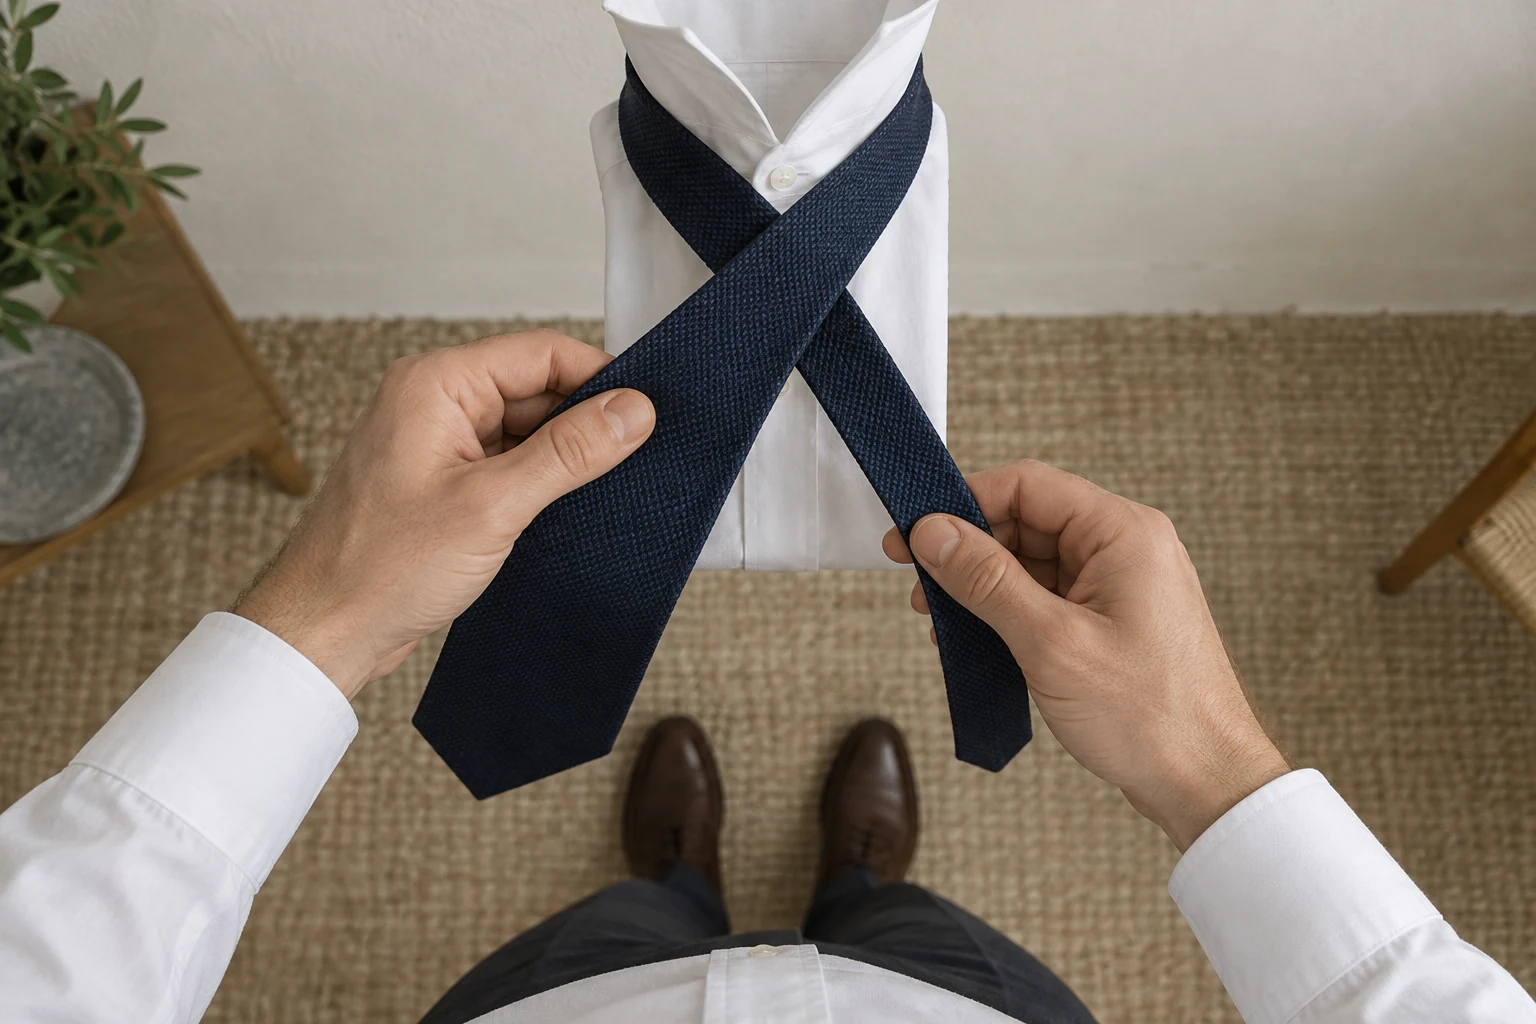
Put the shirt on, fasten the top collar button and turn the collar up so it stands around your neck. Drape the tie over your neck with the seam side against your shirt, the wide end hanging on your right and the narrow end on your left. The wide end does all the moving, so it needs most of the length. A good starting point is the narrow tip just above your navel, which usually leaves the wide end hanging about a foot (30 cm) lower. Treat that as a first guess: your height, your neck and the length and thickness of the tie all shift it, and your first attempt will tell you which way to adjust.
Two openings appear while you tie, and naming them now saves confusion later. The neck loop is the circle of tie around your collar, the space between the fabric and your neck. The front band is a short horizontal wrap you make across the face of the knot near the end. Most first attempts that fall apart have sent the wide end through the wrong one of these two, so keep them separate in your head before you begin.
Left and right always mean your own hands
Every direction in this guide belongs to you, the person wearing the tie: right is the side of your right hand. That sounds obvious until you watch a video. Most tutorials are filmed with someone facing the camera, so their right hand appears on the left of your screen, and some animations are drawn as though you were looking at your own reflection. Translating each move sideways while you hold fabric under your chin is exactly where people get lost. Read the direction, notice which of your hands the wide end is nearest, and ignore which side of the screen it is on.
The four in hand is forgiving here too. If you start with the wide end on your left and reverse every direction, you get the same knot leaning the other way, which is perfectly wearable and may feel more natural if you are left handed. Trouble starts only when you switch systems halfway through. That same reversal is why doing this for another person feels so strange, and our guide to tying a tie on someone else explains where to stand and how to translate each move.
How to tie a tie step by step
Keep the narrow end still and let your right hand move the wide end. Hold each crossing lightly a few inches below your collar, loose enough that the fabric can still slide. You tighten everything at the end; a knot pulled hard at every stage leaves no room for the final pass.
Cross the wide end over
Carry the wide end from your right across the front of the narrow end to your left, crossing a few inches below the collar. Pinch the crossing between your left thumb and forefinger.
CheckThe wide end now hangs on your left, and the two blades form an X under your chin with the wide end on top.
Wrap it behind
Pass the wide end behind the narrow end, from your left back to your right. Keep it flat as it goes around so it does not twist.
CheckThe wide end is back on your right and has gone halfway around the narrow end, which stays pointing straight down.
Cross the front again
Bring the wide end across the front once more, from your right to your left. This horizontal strip is the front band. Slip your left index finger under it and leave it there as a placeholder.
CheckThe wide end is on your left, and a band of fabric crosses the knot with your finger behind it.
Come up through the neck loop
Lift the wide end up from underneath, between the forming knot and your shirt, and bring it up through the neck loop so the tip appears above the knot at your throat.
CheckThe wide tip points up toward your chin, and your finger is still holding the front band open.
Go down through the front band
Fold the tip down and feed it through the front band your finger is holding open, then remove the finger and draw the wide end through. Keep the blade flat as it passes.
CheckThe wide end hangs straight down over the knot and covers the narrow end, and the knot holds together without your hands.
Tighten and slide it up
Hold the knot loosely and draw the wide end down to firm it. Then hold the narrow end below the knot and slide the knot up until it closes over the top button, snug but not tight. Fold the collar down all the way around.
CheckA slim, slightly lopsided knot sits between the collar points, and the collar covers the tie at the back of your neck.
Check the length before you leave
Stand straight with your arms at your sides and look in a mirror. The tip of the wide end should land around the middle of your belt buckle, or at the top of the waistband if you are not wearing a belt. Tie makers such as The Tie Bar and TieMart give this as the convention, and it holds for most suits and office trousers. A tie that stops a few inches above the belt looks outgrown; one that hangs well past the buckle looks borrowed from someone taller. The narrow end should finish shorter than the wide end and stay hidden behind it, and most ties have a small keeper loop on the back of the wide blade to hold it there.
If the length is wrong, do not fix it by dragging the knot up or down. Untie it, move your starting point an inch or two (about 3 to 5 cm) and tie again: start the narrow end higher if the wide tip came out too short, lower if it came out too long. Change only the starting point so you know what fixed it. If the wide end is still short when the narrow end barely reaches the knot, the tie itself is too short for you, and our guide to how long a tie should be covers extra long ties and how height, neck size and knot choice change the numbers.
Add a dimple, or leave it smooth
The dimple is the small fold just below the knot that makes the top of the blade curve instead of lying flat. It is optional, but it makes a plain knot look finished and helps the tie drape. Make it during the last step, before the knot is tight: press your index finger into the center of the wide blade just under the knot, pinch the edges of the blade together around it with your thumb and middle finger, and hold that fold while you slide the knot up to the collar. Give it a final pinch once the knot is in place.
Textured silks and ties with a ribbed or woven surface hold a dimple well because the fabric has some grip. Thin, slippery ties may let it fall out by lunchtime, and many knit ties look better without one. A single centered dimple is the classic version. If it will not form after two tries, a clean, smooth knot looks better than a crumpled one, and nobody will notice its absence.
When to choose a different tie knot
The four in hand is enough for most of life: interviews, offices, weddings and funerals. It is slim and slightly asymmetrical, suits button down and point collars, and keeps a heavy tie from turning into a lump. Once you can do it without looking, our detailed four in hand guide covers its finer points. You change knots mainly for proportion, when the knot looks lost between wide collar points or too bulky for a narrow collar. Always try a new tie knot in the shirt you intend to wear, because the collar decides a great deal; our guide to types of shirt collars shows how much room each style leaves for a knot.
For a fuller, more symmetrical triangle, learn the half Windsor, a sensible second knot for spread collars and business suits. The full Windsor is broad and formal and fills a wide spread collar, but it uses noticeably more of the tie, so taller men can run short. The Pratt knot, also called the Shelby, lands between the four in hand and the half Windsor in size and starts with the tie inside out.
If your tie is thick wool or a chunky knit, the small Oriental knot keeps the bulk down. The Eldredge knot is a braided, decorative knot tied with the narrow end, a project for a relaxed occasion rather than a rushed weekday morning. Black tie calls for something else entirely: learning how to tie a bow tie is easier than it looks, because it is essentially the bow you tie in your shoelaces, laid flat at the collar.
| Knot | Shape | Best with |
|---|---|---|
| Four in hand | Slim, slightly asymmetrical | Button down and point collars, heavy ties, most occasions |
| Half Windsor | Fuller, more symmetrical triangle | Spread collars and business suits |
| Full Windsor | Broad and formal, uses more tie | Wide spread collars; taller men may run short |
| Pratt or Shelby | Between four in hand and half Windsor | Starts with the tie inside out |
| Oriental | Small | Thick wool or chunky knit ties |
| Eldredge | Braided and decorative | Relaxed occasions, tied with the narrow end |
Always try a new knot in the shirt you plan to wear, since the collar decides a great deal.
Common mistakes
Pulling the narrow end to take it off
The four in hand falls apart when you pull the narrow end out, which makes this tempting. Done hard and often on a tight knot, it strains the stitching and creases the silk. Loosen the knot first, reverse the moves, and hang or roll the tie untied so the wrinkles relax before the next wear.
Tightening before the last pass
If you pull the knot firm after crossing the front, the front band closes and there is nowhere for the tip to go. Keep a finger under the band until the wide end has gone through it, and do all the tightening in the final step.
Leaving a gap at the collar
A knot that sits an inch below the collar, with the top button showing, reads as unfinished. Slide it all the way up while holding the narrow end. If you cannot fasten the top button comfortably, the shirt collar is too small for you, and no knot will fix that.
Hiding a twist instead of undoing it
If the back of the wide blade or its seam shows on the front, the blade turned over during the wrap behind or the final pass. Twisting the tip around afterward only spreads the twist into the knot. Untie it and watch those two steps on the next attempt.
Questions people ask
What is the easiest way to tie a tie?
The four in hand is the easiest dependable knot: over, behind, across, up through the neck loop and down through the front. It works with almost any tie and collar, and a mistake costs you only a few seconds. Practice it twice at home before the day you need it, and it will hold up under pressure.
Where should the tip of a tie end?
The usual convention is at the middle of your belt buckle or the top of your waistband when you stand straight. Slightly above or below is fine; several inches off in either direction is what looks wrong. Adjust the starting length rather than the knot to move it.
Which tie knot should I use for a job interview?
A neat four in hand or half Windsor is right for almost any interview. What matters more is that the knot is snug at the collar, the tie is not twisted, and the tip reaches the belt. Pick the knot that looks balanced in your shirt and that you can tie without fuss on the morning itself.
Why does my knot lean to one side?
The four in hand is naturally a little asymmetrical, so a slight lean is normal and many people like it. If you want a centered triangle, the half Windsor or Pratt knot gives you one. A strong lean or a bulge on one side usually means the front band was loose or twisted, so retie and keep it flat.
Is tying a tie different for women or for a school uniform?
No. The steps are the same whoever wears the tie, and the four in hand is a sensible first knot for a school tie because it is small and quick to redo. A standard tie can run long on a shorter wearer, so start with the narrow end higher, or choose a shorter tie so the tip still lands near the waistband. A shirt that buttons on the opposite side makes no difference to the knot.
Can I tie a tie without a mirror?
Yes. The checkpoints above describe where the wide end should be after each move, so you can work by feel and look down to confirm. Use a mirror afterward only to check the length, the dimple and whether the knot sits centered between the collar points.
Sources and further reading
References used for this guide. Each opens the original page in a new tab.
- Ties.com four in hand knot instructions Opens in a new tab
- Animated Knots by Grog: four in hand necktie knot Opens in a new tab
- Tie-a-Tie.net four in hand instructions Opens in a new tab
- Tie-a-Tie.net guide to making a tie dimple Opens in a new tab
- The Tie Bar tie length guide Opens in a new tab
- TieMart tie size chart and length guide Opens in a new tab
Keep reading

Ties and knots
Four in hand knot: how to tie the everyday tie knot
Tie a four in hand knot step by step from your own point of view, with a checkpoint after every move, the collars it suits, and fixes for a knot that runs long.

Ties and knots
Half Windsor knot: how to tie it step by step
Tie a half Windsor knot step by step, with checkpoints after each move, the collars and tie fabrics it suits, and fixes for a knot that looks lopsided or bulky.

Ties and knots
How long should a tie be, and where should the tip land
How long should a tie be? Where the tip should land, standard and extra long tie lengths, how your knot changes the result, and matching tie width to lapels.

Ties and knots
Windsor knot: how to tie a full Windsor, step by step
Tie a full Windsor knot step by step, with a checkpoint after every move, the collars and ties it needs, and fixes for a knot that is lopsided, bulky or too short.

Ties and knots
How to tie a bow tie, step by step
Learn how to tie a bow tie step by step, with a checkpoint after each fold, how to find the hidden opening, and how to fix a bow that is lopsided or loose.